by Michael Salmon
The techniques used to assemble leather and birch-bark handled knives are
very similar, though the finishing techniques are rather different. This tutorial
will focus on producing a leather-handle, but will also bark handles. The
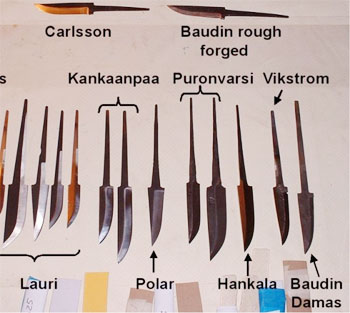
choice of blade is more or less infinite, provided it has a stick-tang,
and has either sufficient length to set a rivet (5mm longer than the
handle for a simple rivet and 10mm for a rivet washer) or alternatively
it has a threaded end to take a lock-nut. Solingen blades sold here are
ideal for the lock-nut arrangement. Most of the blades shown in this picture
are good for riveting, but the two at the top are too short. These are both
high quality hand made blades, so don’t assume that a blade will work,
though factory blades are more consistent. Photos are often clipped,
not showing the full tang length, so tell the supplier what you need
the blade for.
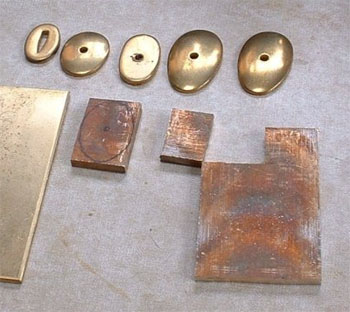
You can’t make an entire handle out of leather. The end pieces play an
important support role, they can be metal, horn, antler or wood. The 3mm
brass or nickle silver bolsters and butt washers shown at the top are
available here and work well, or you can make your own, as I did here.
Moose antler is strong and attractive. I use rosencrans to avoid marrow
which may weaken the handle. A strong ebony, or buffalo horn section will
also work well at either end.
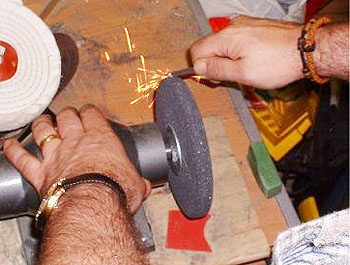
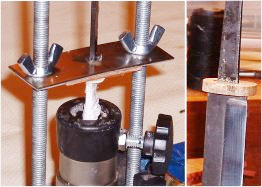
The last 10-15mm of the tang has to be filed (or ground as here) to
fit through the butt cap and to form the rivet later on. If you have
a strong material for the back section, you won’t need a rivet washer
(pommel) to set the rivet, you can countersink the rivet and finish
it flush. I’ll go into this later. If you make your own butt cap,
drill a 3mm hole for the thinned-down end of the tang to project through
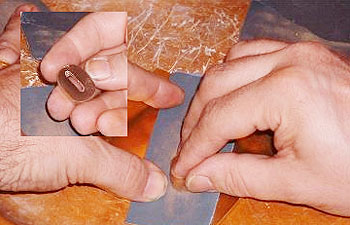
.The solid front piece (bolster) should be finished perfectly before
fitting it to the tang, it is much easier to do this now than later
when the knife is put together. Most hand-forged blades have a curve
where the blade joins the tang. This reduces the likelihood of
stress-fractures, so don’t file the shoulder of the blade flat to
fit the bolster. File the inside of the bolster to fit the blade!
Why buy an expensive blade and then make it more likely to break?
The bolster should be fixed firmly to the tang before you do anything
else. Wrap the blade and the front of the bolster carefully with
masking tape, then smear with Vaseline; this makes it less likely
that you will get epoxy in the wrong place. Use rapid set epoxy,
but leave it overnight to cure.